
Piecing Small using Interfacing

Sewing squares smaller than 2 inches might sound too fiddly, but I have the best hack to make small piecing a breeze! You’ll be using up small scraps and making some super mini quilts in no time!
The finished size of the squares I used for this project are 3/4 inch! If you try this tag me on Instagram or use #freetimefibers #freetimefiberstutorial or #FTFtutorial to share what you’ve made!
What you’ll need:
Fusible interfacing (amount depends on the size of your project)
Scraps you can cut to size or any small squares you have
A pen or pencil to draw the grid
Your iron
A seam ripper or sharp scissors
Your favorite sewing machine and sewing notions
1. Cut your pieces and determine layout.
This method works well with cut squares of 3 inches or less. The size of your scraps might also determine the size of your squares. I cut mine to 1.25 inches since this was the approximate size of the half square triangles I had in my scrap pile. They ended up being 3/4 inch squares when the piece was finished! Cut a good handful of squares and arrange them in a layout you like.


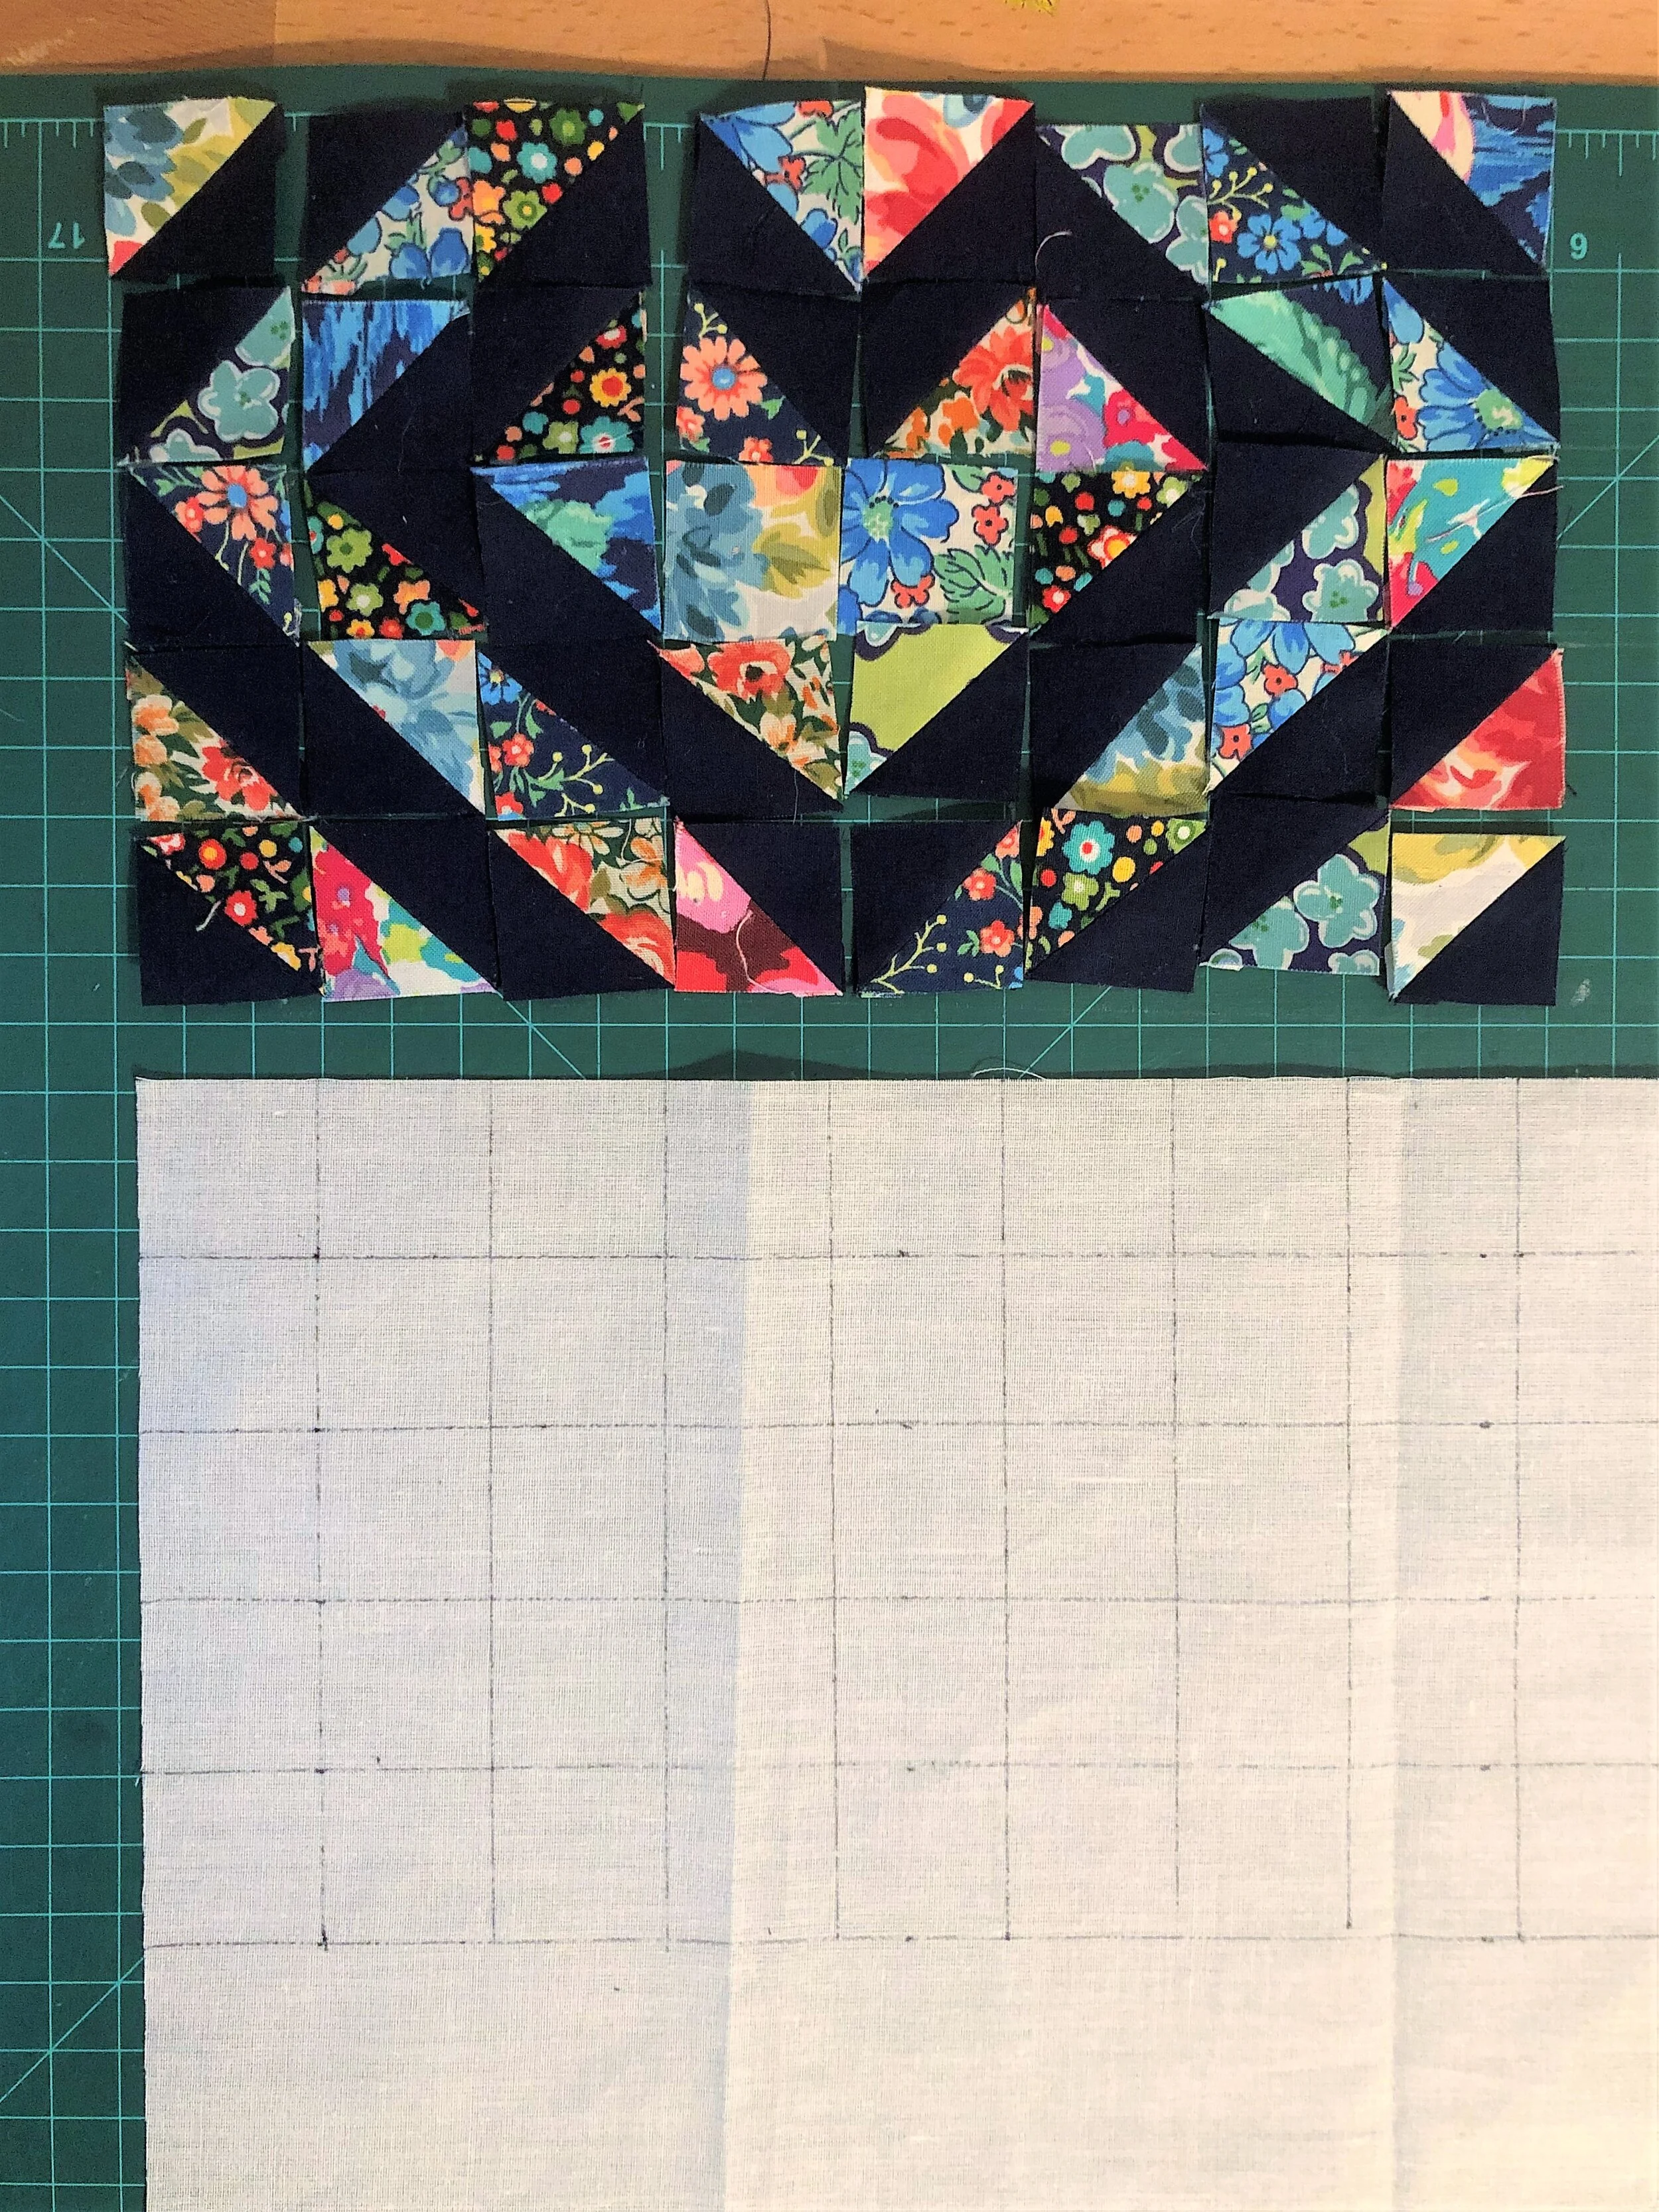
Draw a grid that matches the size of your squares and layout. For instance, my layout was 5 squares by 8 squares so I drew 5 rows and 8 columns on the interfacing. Each square on my grid was1.25 inches to match the cut size of each square. Be sure to draw your grid on the fusible side of the interfacing (the bumpy side).
3. Fuse squares to interfacing.
Place each fabric square on top of the interfacing by carefully aligning the raw edges with the gridlines you drew in step 2. Use the iron to fuse the squares to the interfacing. Keep adding squares and fusing with the iron until you’ve successfully fused your entire design onto the interfacing. Cut away excess interfacing.


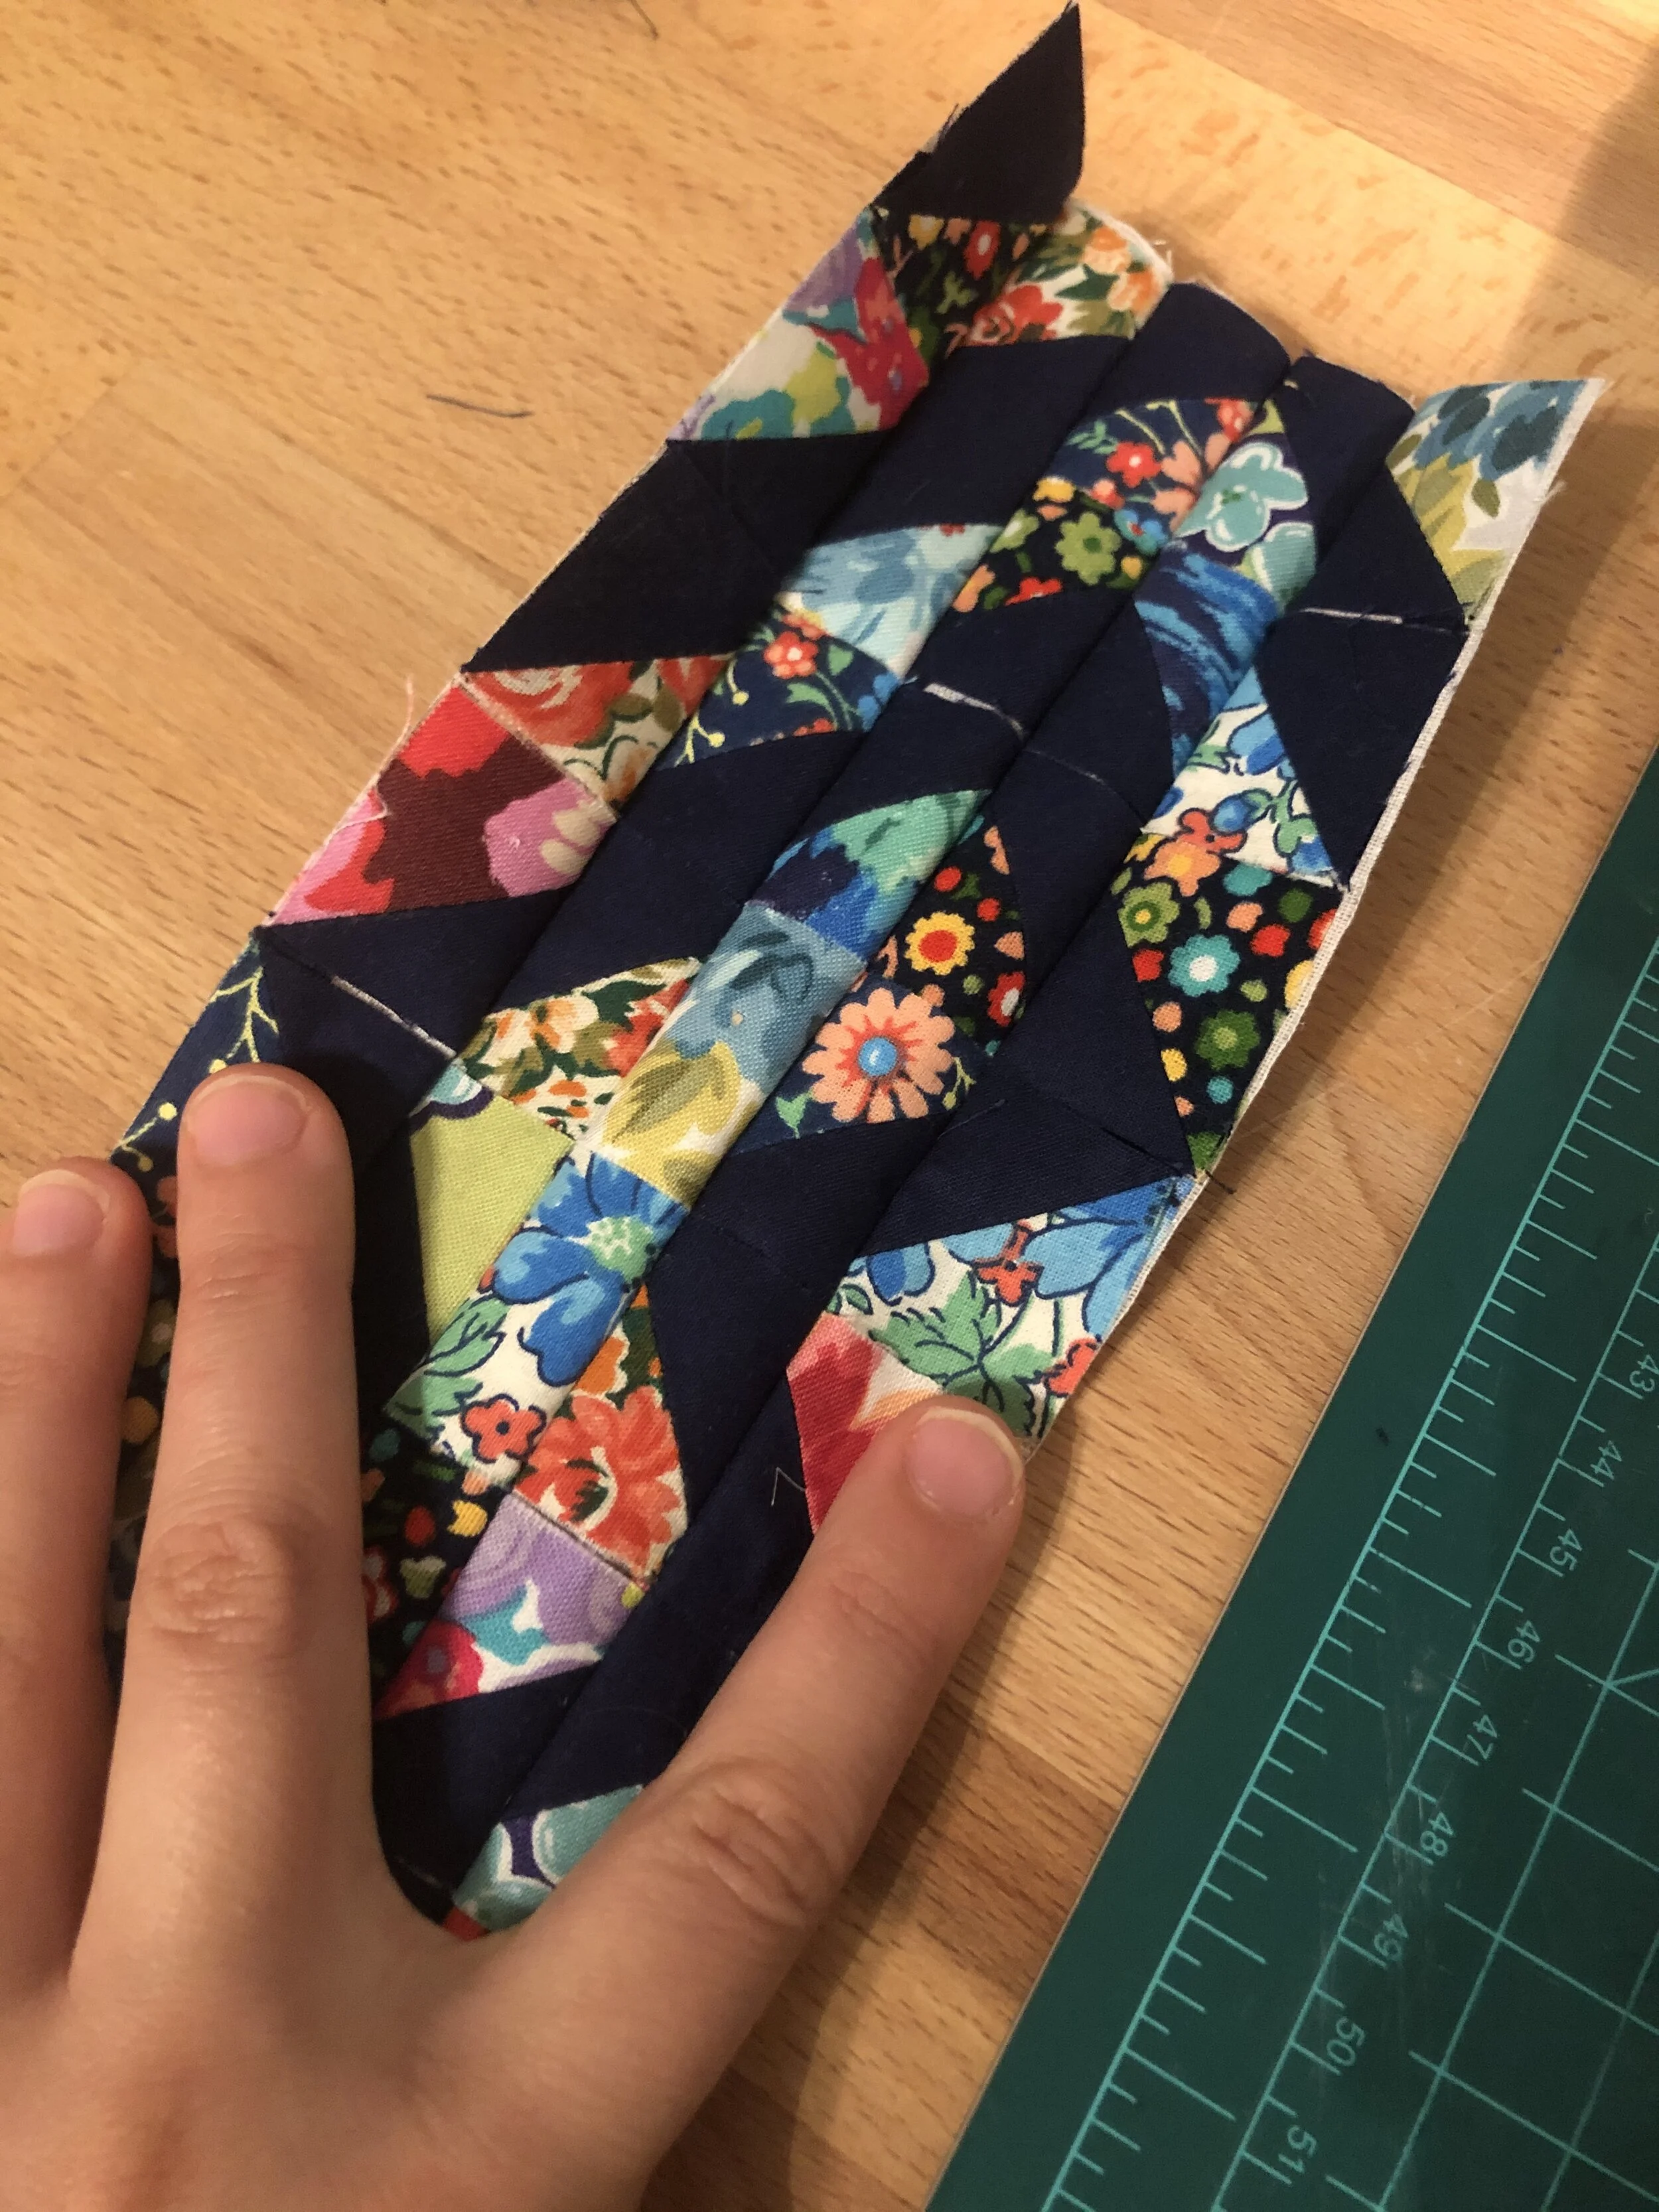
4. Sew the rows.
Fold one row over with right sides together. Sew 1/4 inch in from the folded edge of the interfacing. Continue folding and sewing each row until all rows are sewn. When finished sewing the rows, the wrong side of the piece will have raised ridges where the rows were joined.


5. Cut open seams and press.
Using a seam ripper or small scissors, cut through the interfacing down the length of each row. Press open the seams like you would regularly.

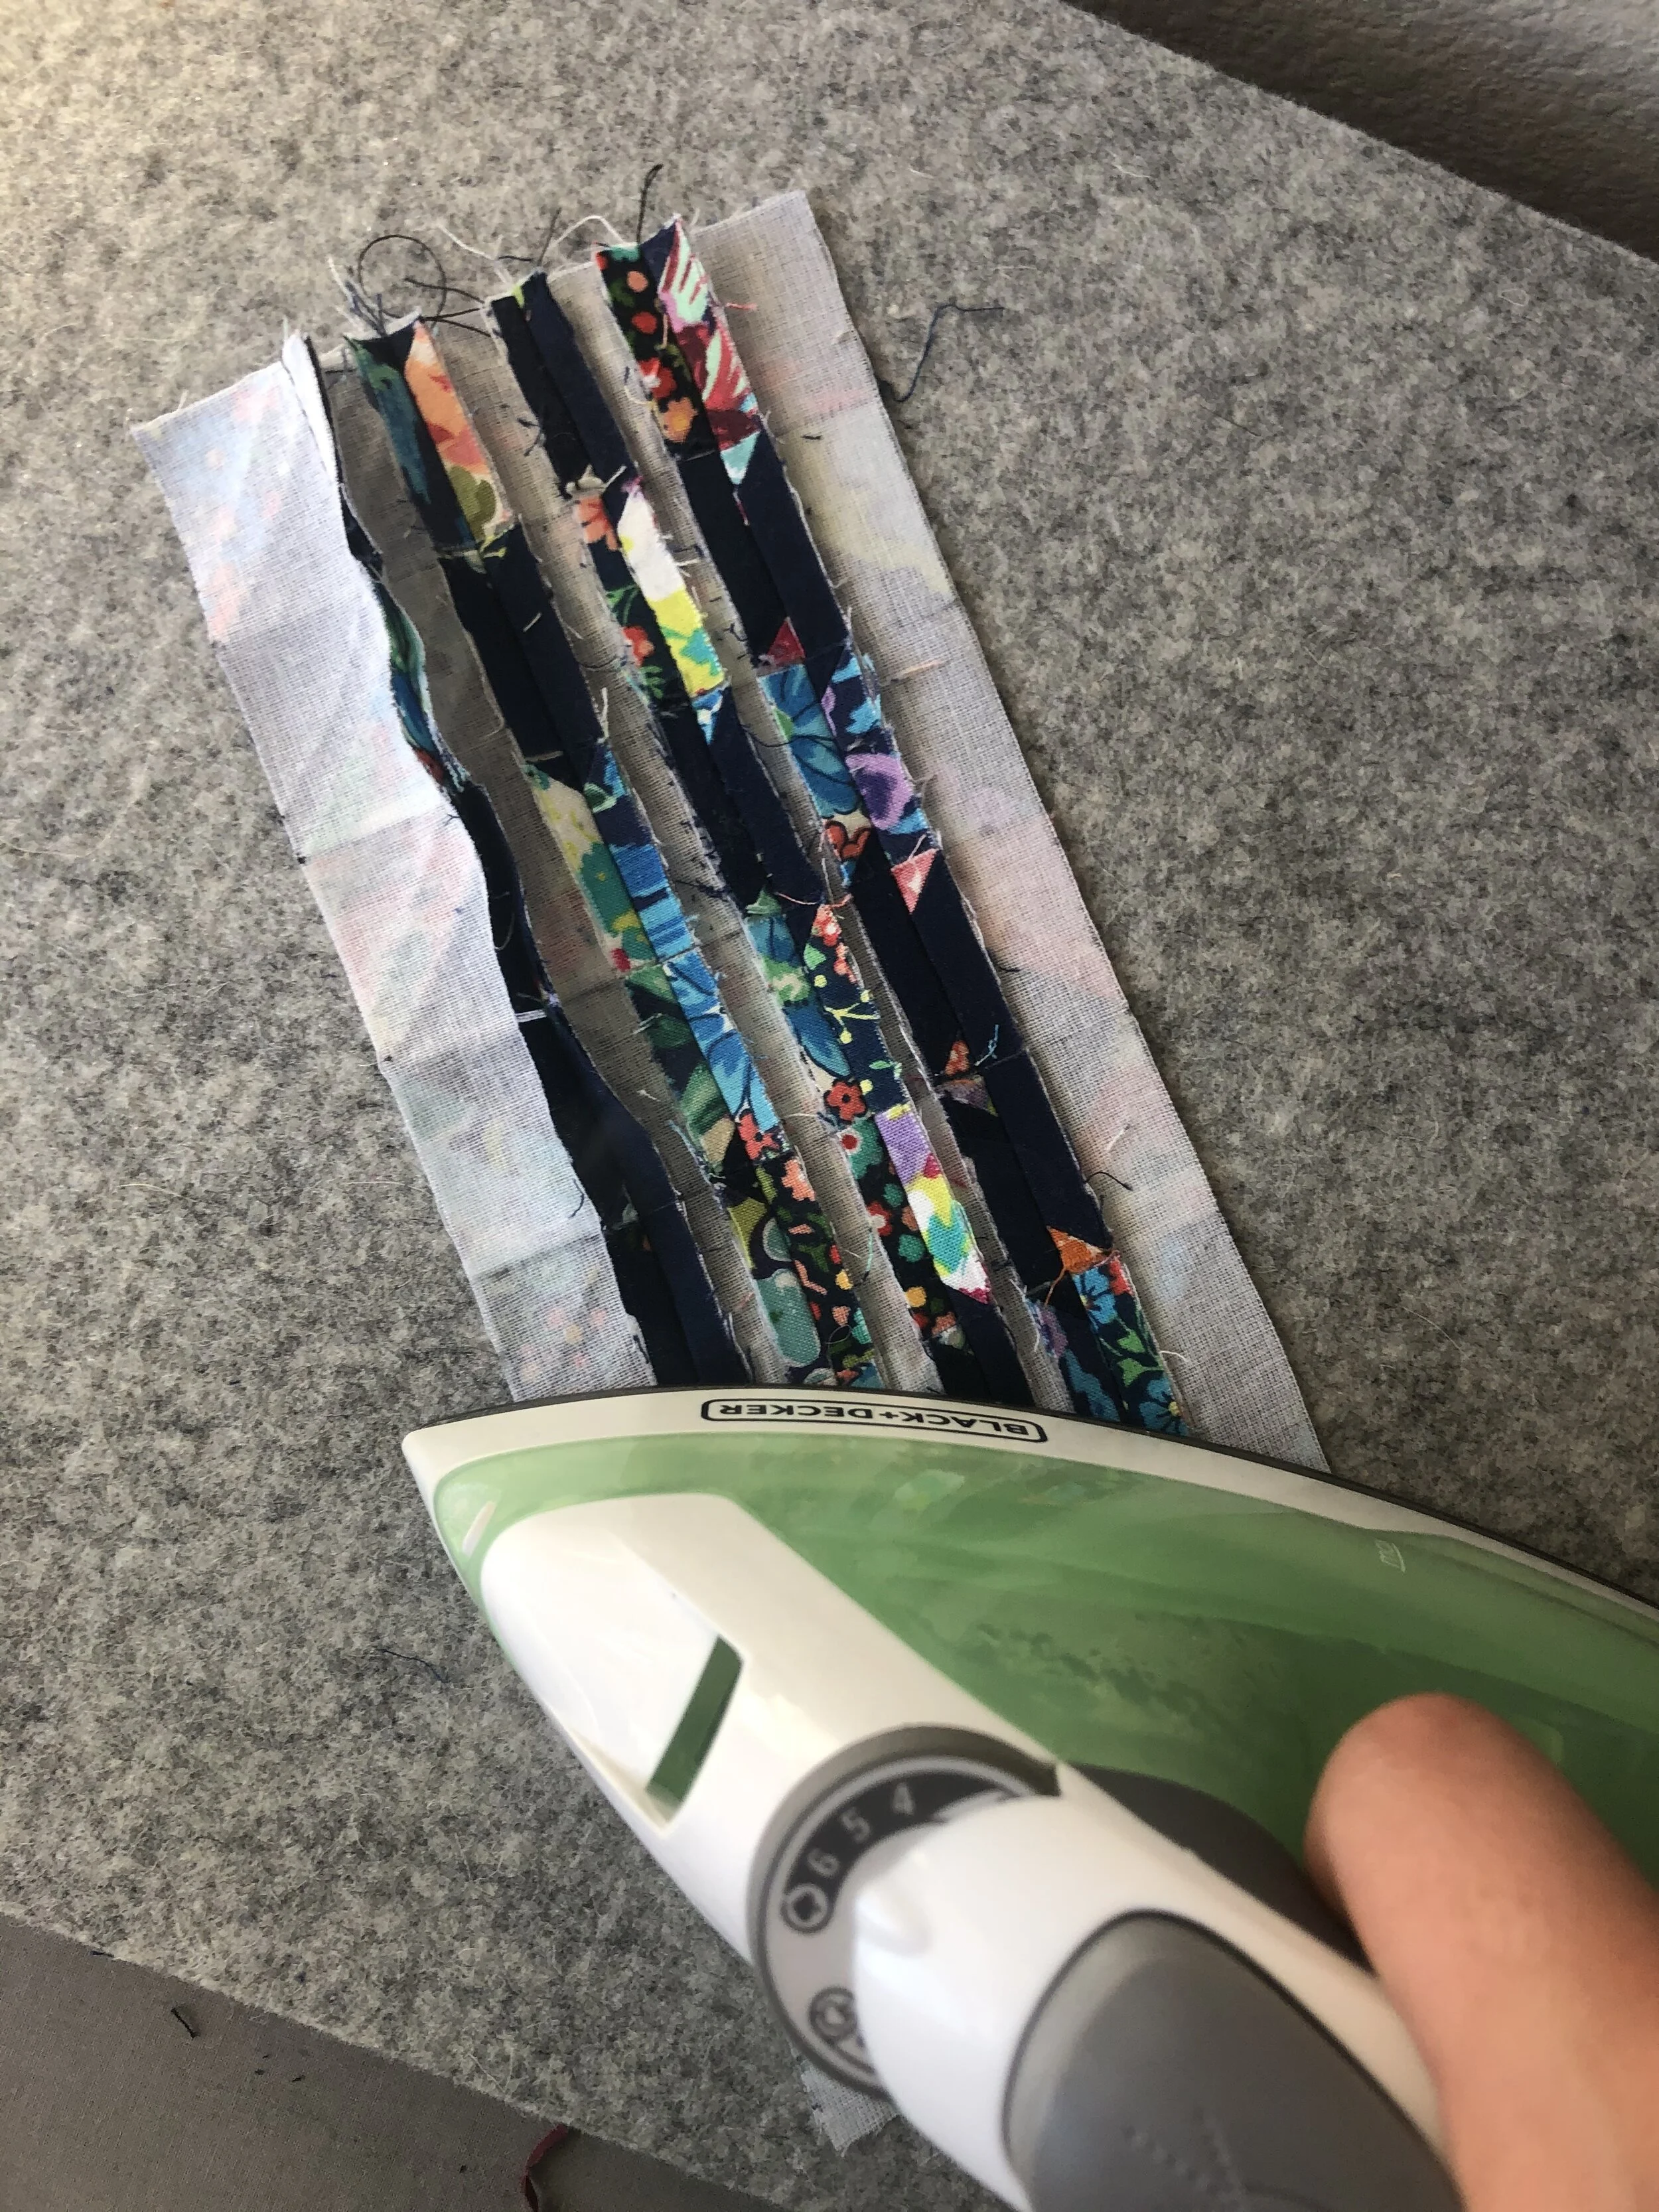

6. Sew the columns, cut seams, and press.
Similar to the rows, fold and sew the seams for the columns. Cut through the interfacing down the length of each column and press open the seams. Give the entire piece a good press to flatten.


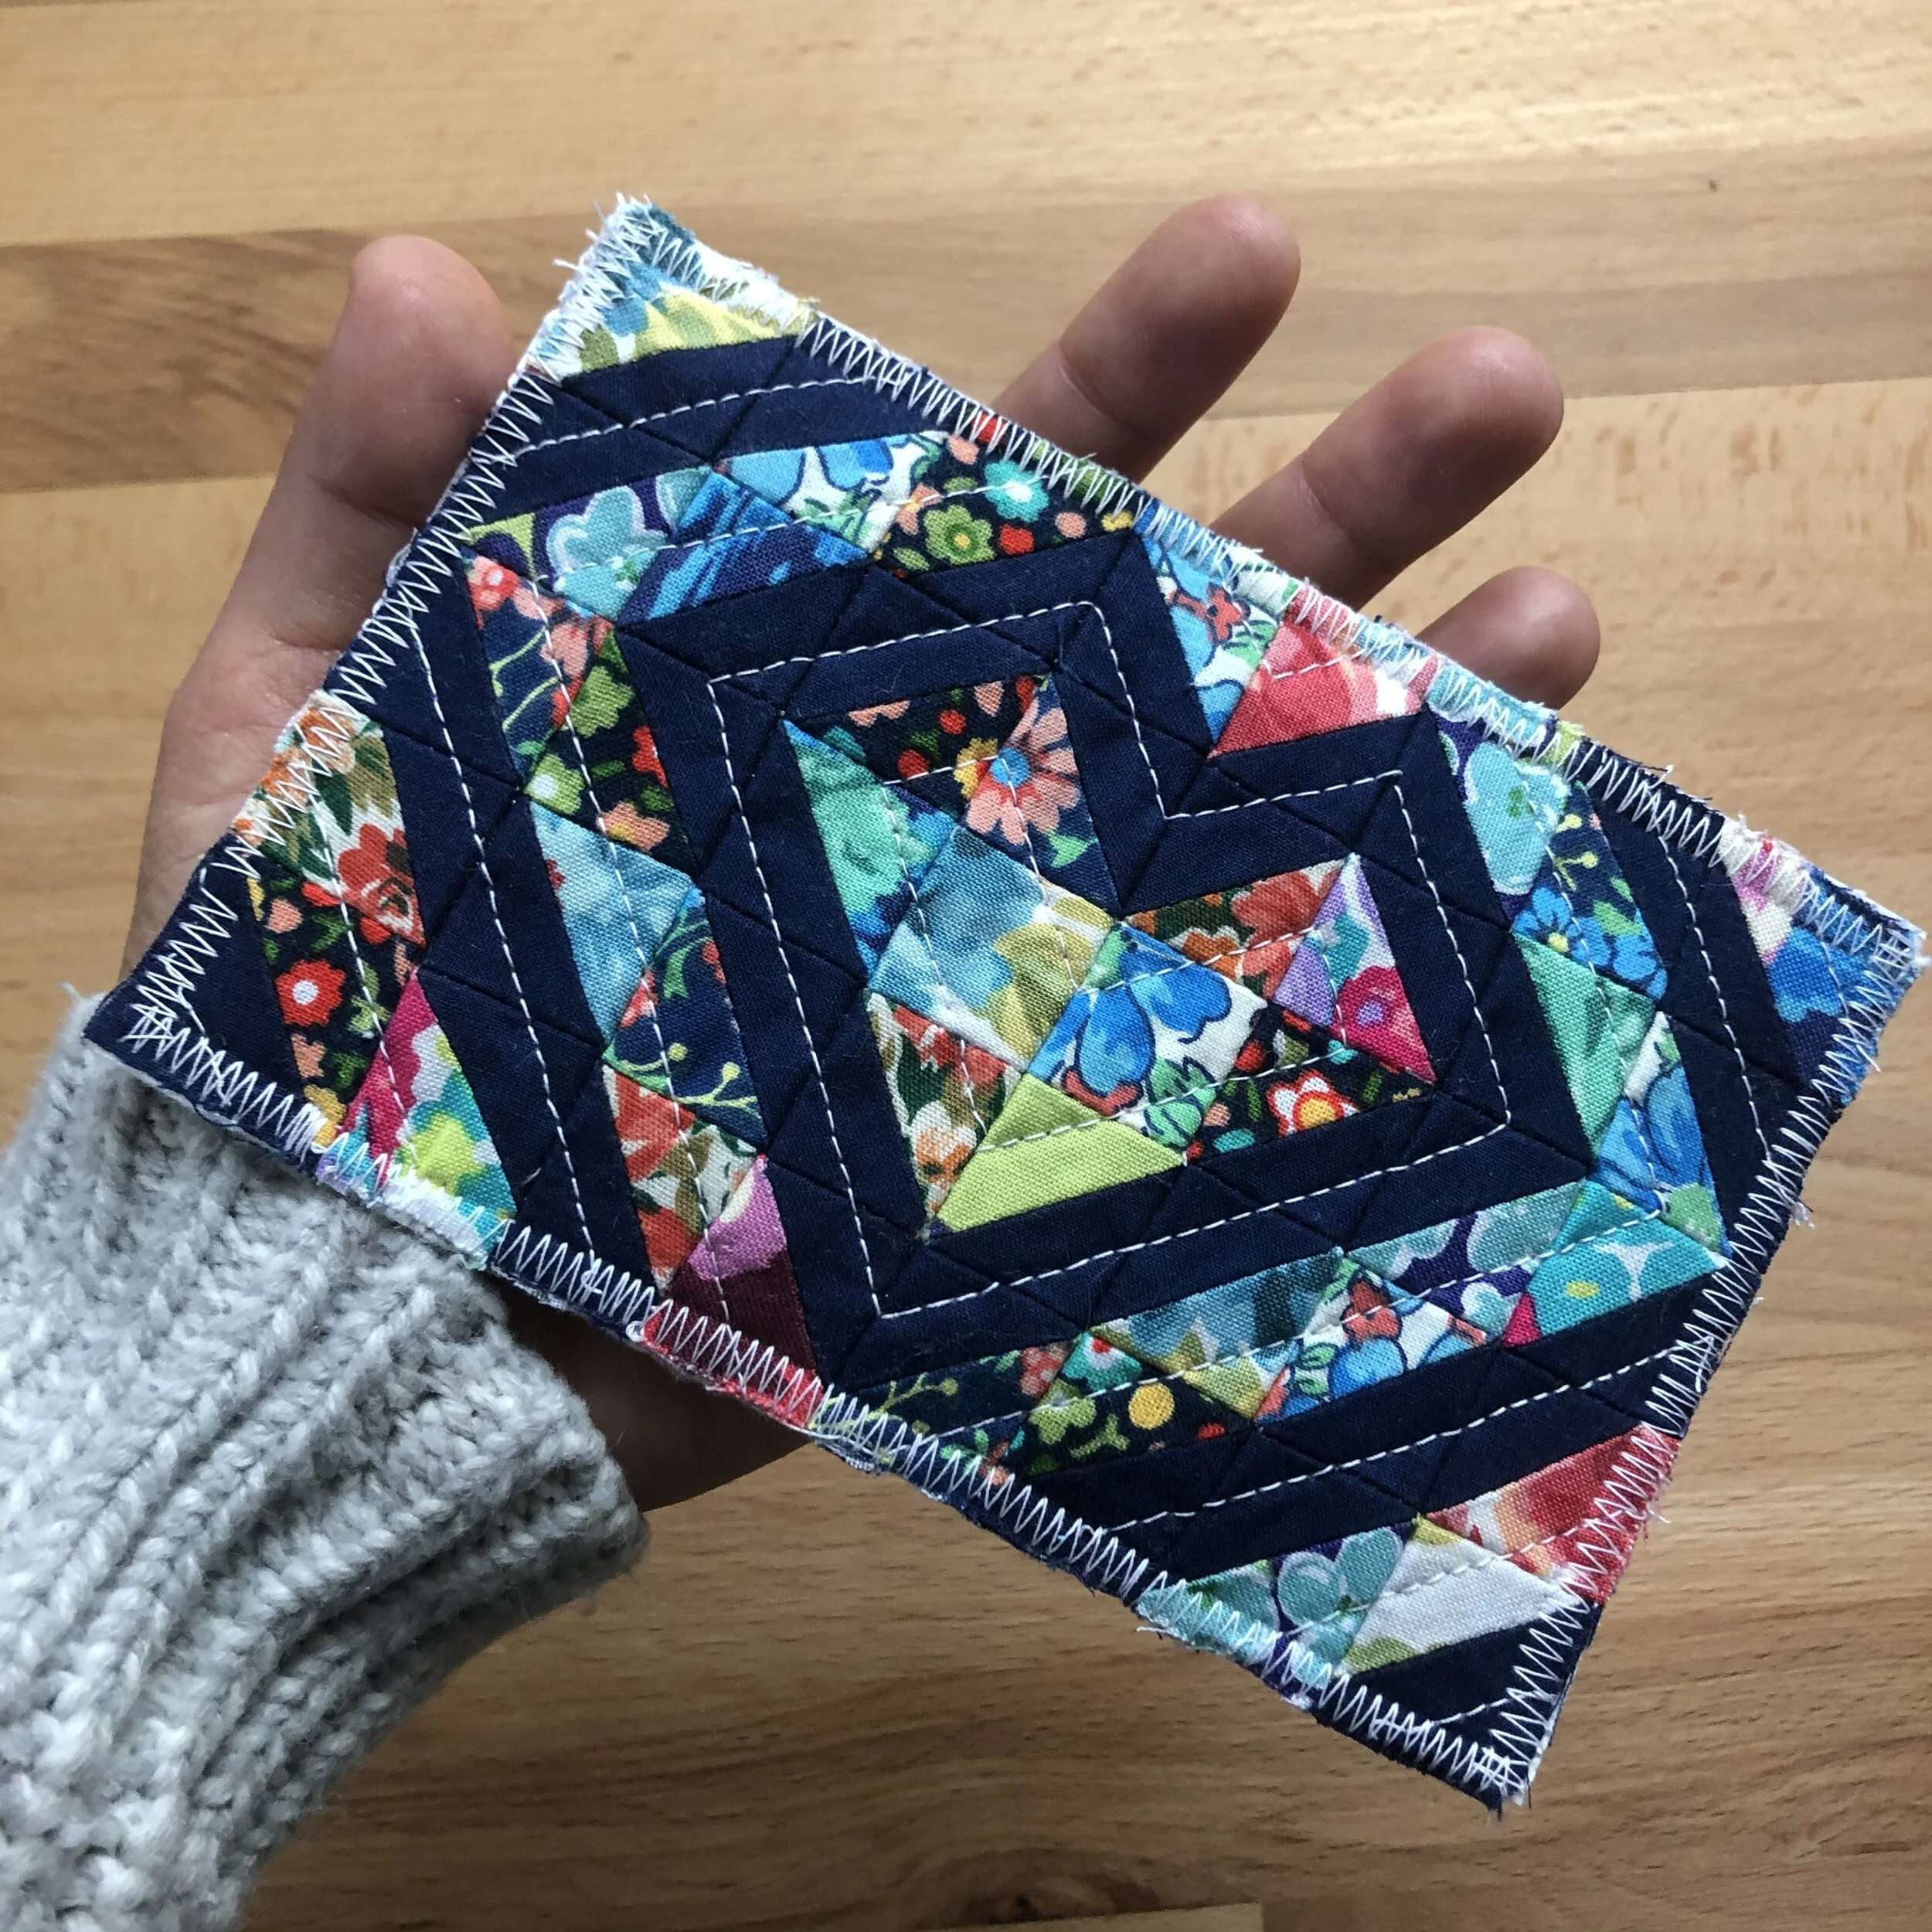
7. Finish your piece
Yay! Take a moment to admire your piece and know that you’ve learned a new skill! Sewing tiny squares is a breeze with this method. Finish your super mini quilt by making a quilt sandwich and quilting as desired.
I made my super mini quilt into a quilted postcard by quilting the quilt top with one layer of batting. I then temporarily glued the quilt to a white notecard before securing the raw edges with a zig-zag stitch.
You can turn this into a quilted pouch or even get some larger pieces of interfacing to make something like a tote bag.
Let me know if you try this interfacing method to sew with small pieces. Tag me on Instagram @freetimefibers or use #freetimefibers #freetimefiberstutorial or #FTFtutorial to share what you’ve made!