
Embroidery Flower Quilt
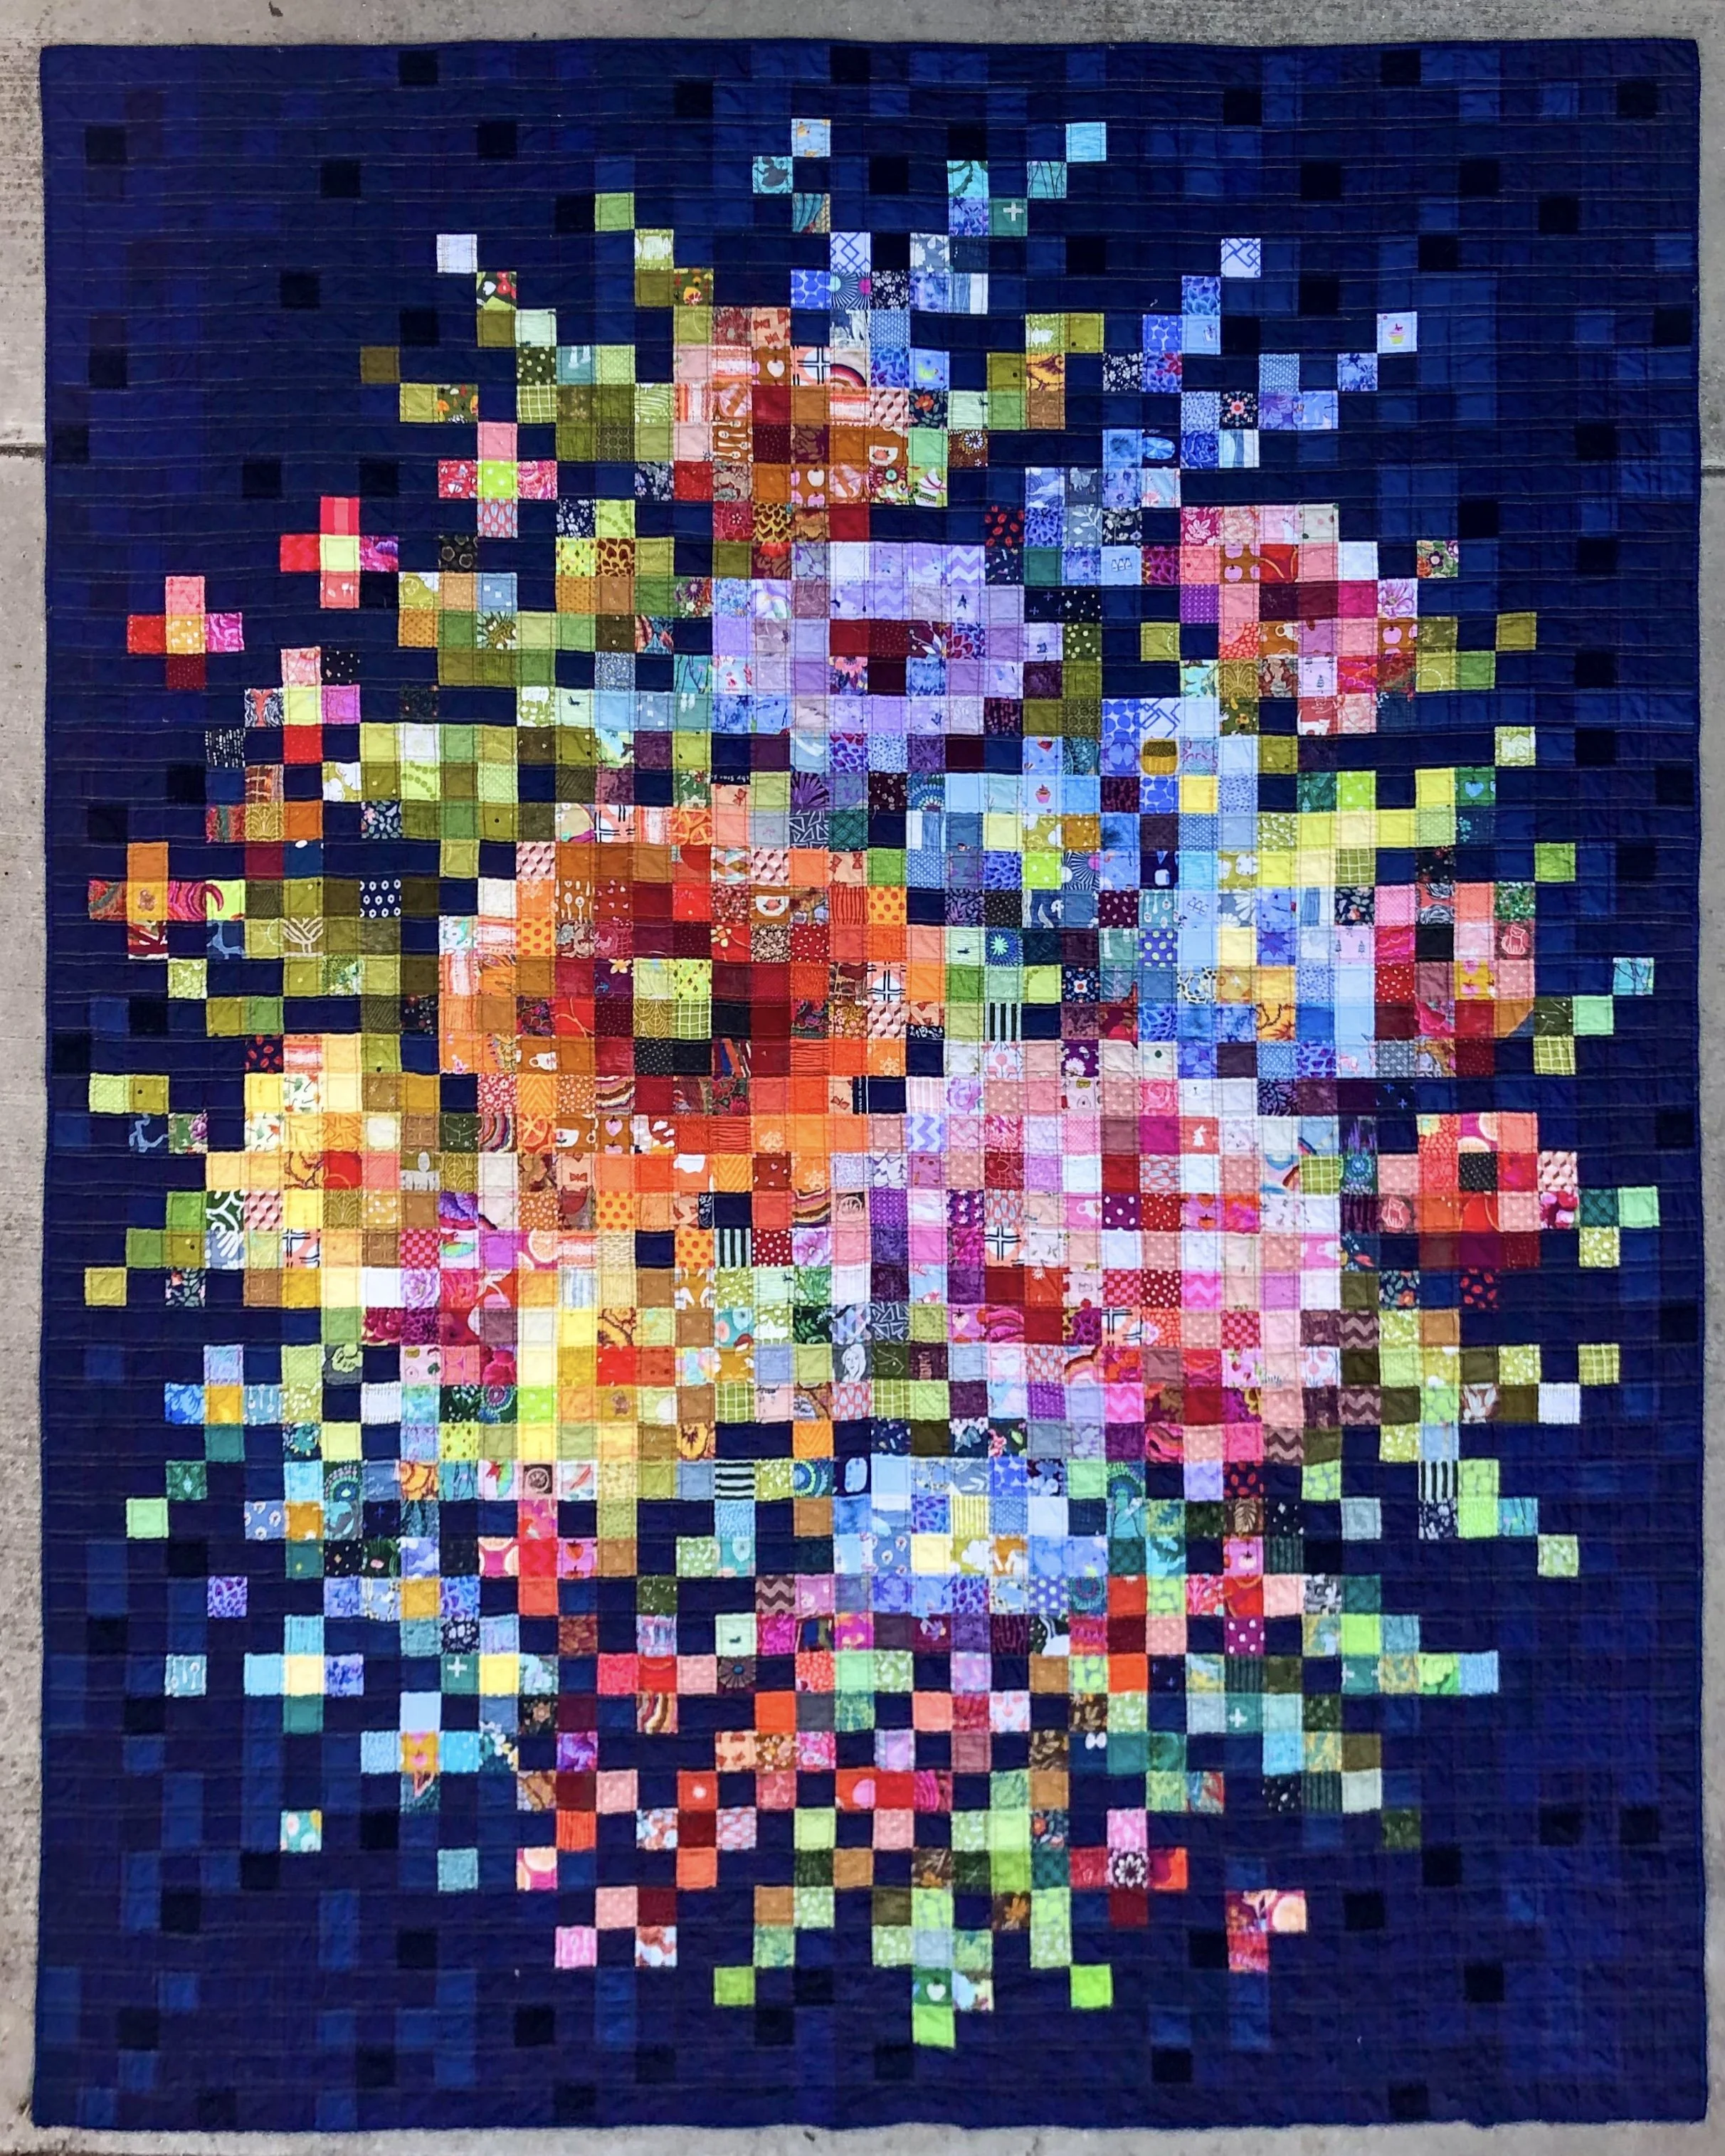
Ever since I saw the free Embroidery Flower Quilt pattern from Tilda Fabrics, I knew I needed to make one…but scrappy. Being just a bunch of squares in a particular order, this pattern is simple to construct if you are organized and follow the well-written instructions. The pattern was written to promote Tilda’s line of cotton solids - there are 46 of them used in this pattern. My brain translated this into a scrap hoarders dream project - an opportunity to use all the bits I’ve been saving up and meticulously organizing for years.
I knew I needed a good plan and organizational scheme to successfully match solid colors to patterned fabrics and keep things in order when I moved into piecing. If you also want to make a scrappy version, think of this article as a record of what worked for me on my journey in making a scrappy Embroidery Flower Quilt.
Cutting out: Organizing the Fabric Squares (Fig. D in the pattern)
First off, the pattern directs you to cut 2” squares - I used 2.5” squares since I had a greater diversity of colors already cut in this size. This meant that my finished quilt would be 84” x 108” instead of 63½” x 81½”.
To help with color matching my stash of pre-cuts to the solids used in this pattern, I printed the Fabric Swatch page (page 3) in color and used this as a guide. As I pulled squares from my stash, I matched them to the colors listed on this page, and placed them in piles with the corresponding Fabric # label (as in Fig. D). Fabric 1, “Peacock”, needs over 1,000 squares - for this I gathered as much of my dark blue/navy fabrics as I could find and went on cutting so I knew I had enough for a random scrappy dark blue background.
Making A Unit: (Figs. E-I in the pattern)
Since I wanted the overall effect to still read as flowers and foliage with the patterned scraps I was using, I didn’t touch the sewing machine until I knew my Units were cohesive and seamless. So using the numbered piles from the “cutting out” step, I laid out each unit on the design wall.
**I’ve seen makers use fusible interfacing for this step - where like my postcard tutorial, you lay and fuse small squares to keep things in order for sewing (see this series). Since I used 2.5” squares, I thought I could manage without.


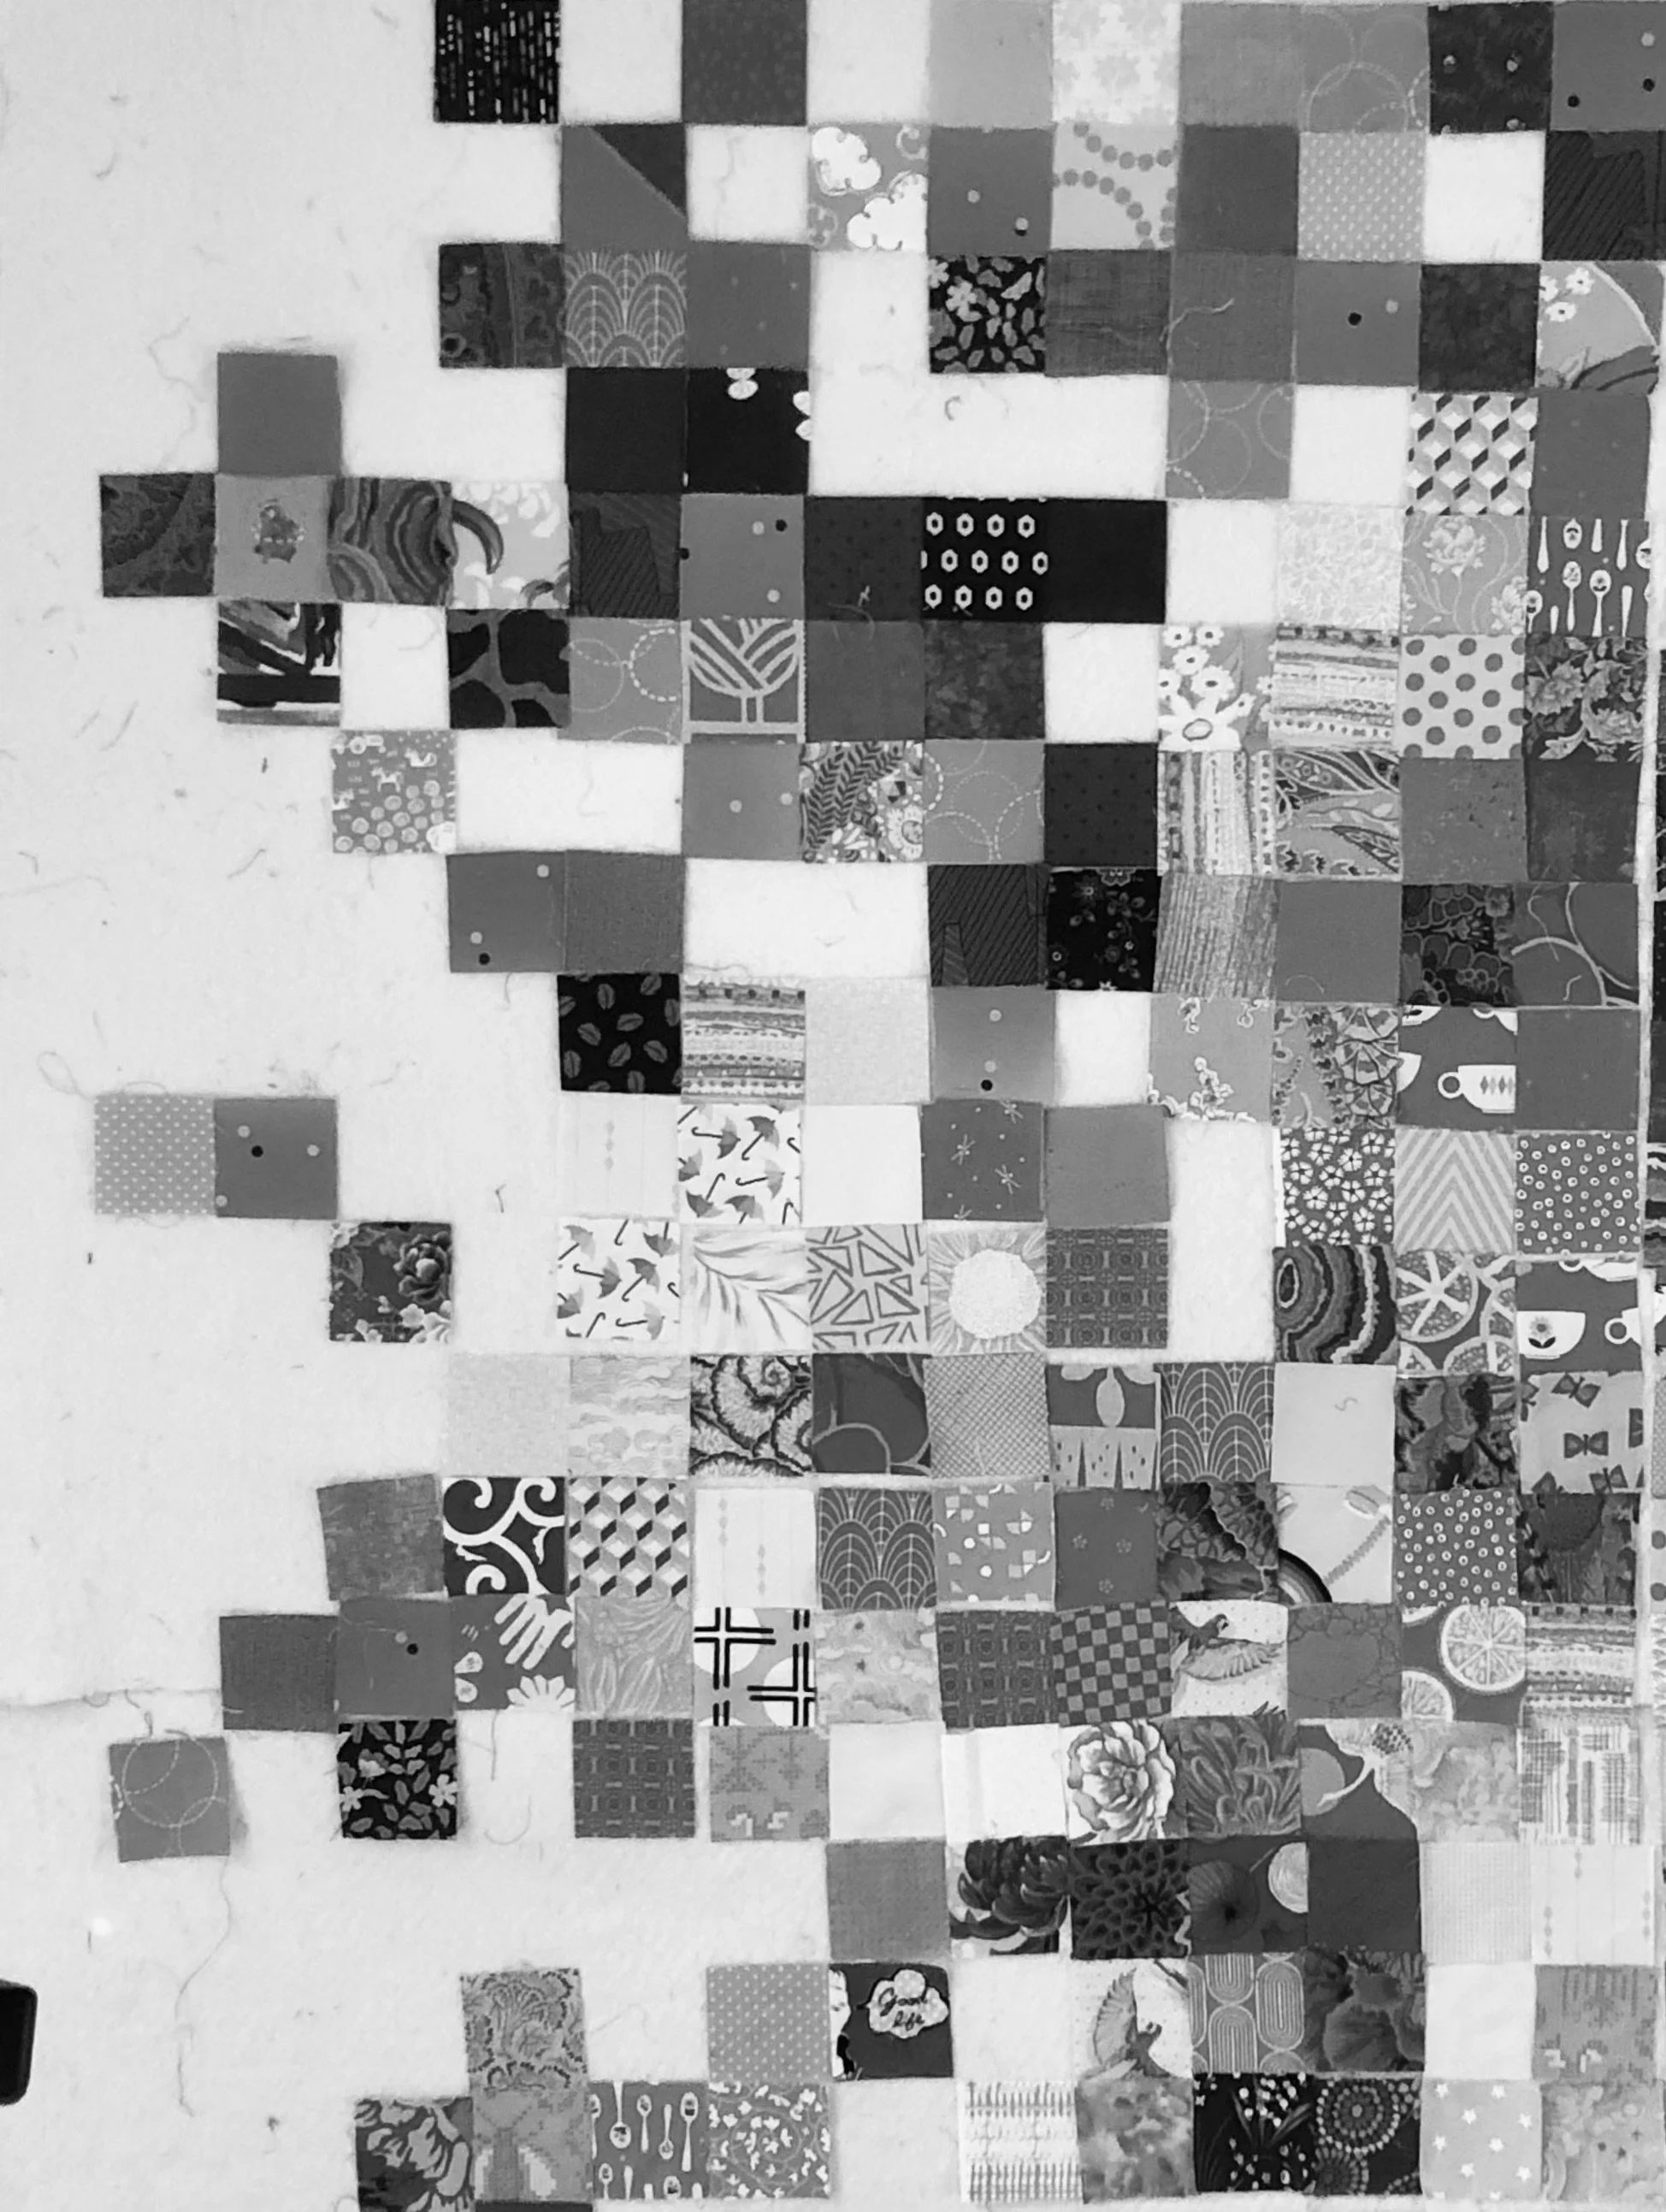
When I had a whole unit, knowing it blended well with the first column or row of the adjacent units, I labeled each square on the back with coordinates corresponding to it’s location in that unit (see photos below). For example, you can think of each unit as an x,y coordinate plane where columns are numbers on the x axis and rows are on the y axis. If this sounds too much like highschool algebra, just think each square has a unique combination of column and row number designating it’s location in that unit. For instance, the square at column 5 in row 10 was labeled as 5,10 and the square in the same row but next column to the right was labeled as 6,10. And so on…


I carefully removed squares in order by row (y coordinate or second number on my label) and stacked these rows together for each unit, finally wrapping it up with a rubber band and label for that unit. Organizing by row made chain piecing easier later on.
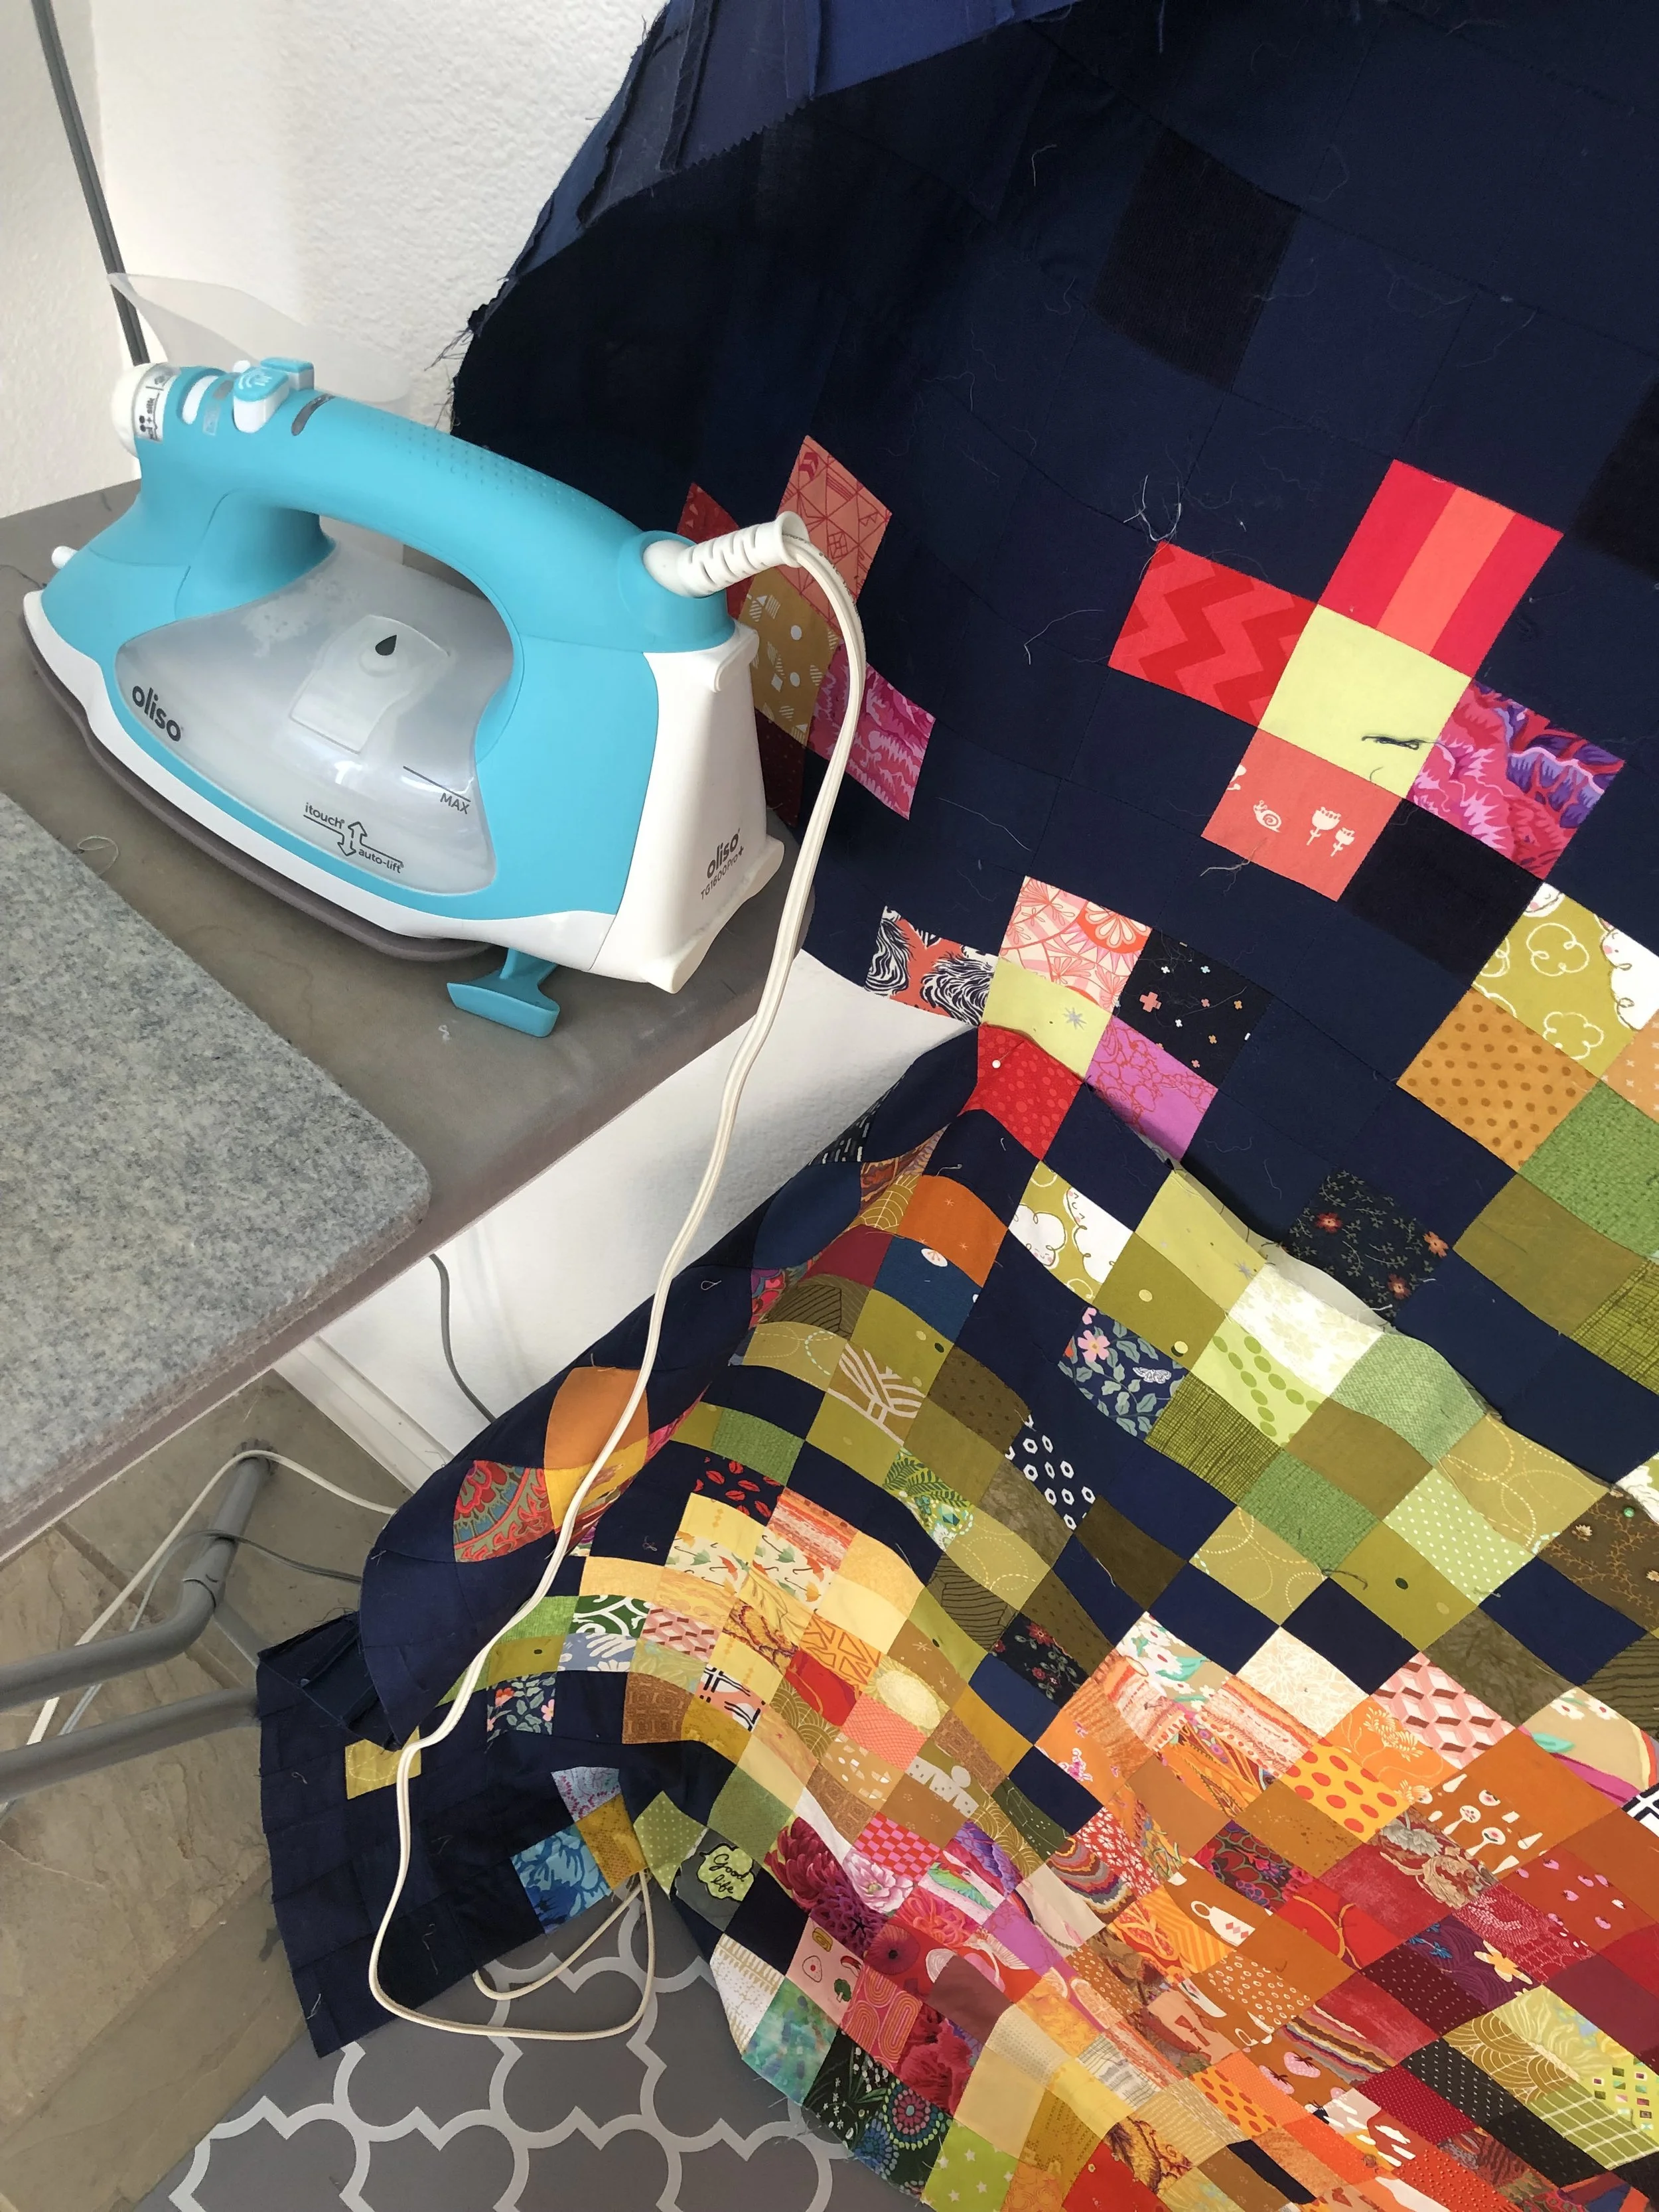
Steps 8-9 tell you to piece the units. Going one unit at a time, I chain-pieced each unit by row - there are plenty of tutorials on chain piecing and I find it’s the easiest way to build large grids. Again, you can use the interfacing method to piece rows and columns pretty quickly.


Assembling the Quilt: With all my previous planning and organization, sewing the units and assembling the quilt top were the easiest step. I didn’t really expect it to be so large, but the design still reads well.
Quilting and Finishing: I used straight line quilting with my walking foot to not distract from the overall design. I used the #embroideryflowerquilt hashtag on Instagram to find inspiration for quilting design.
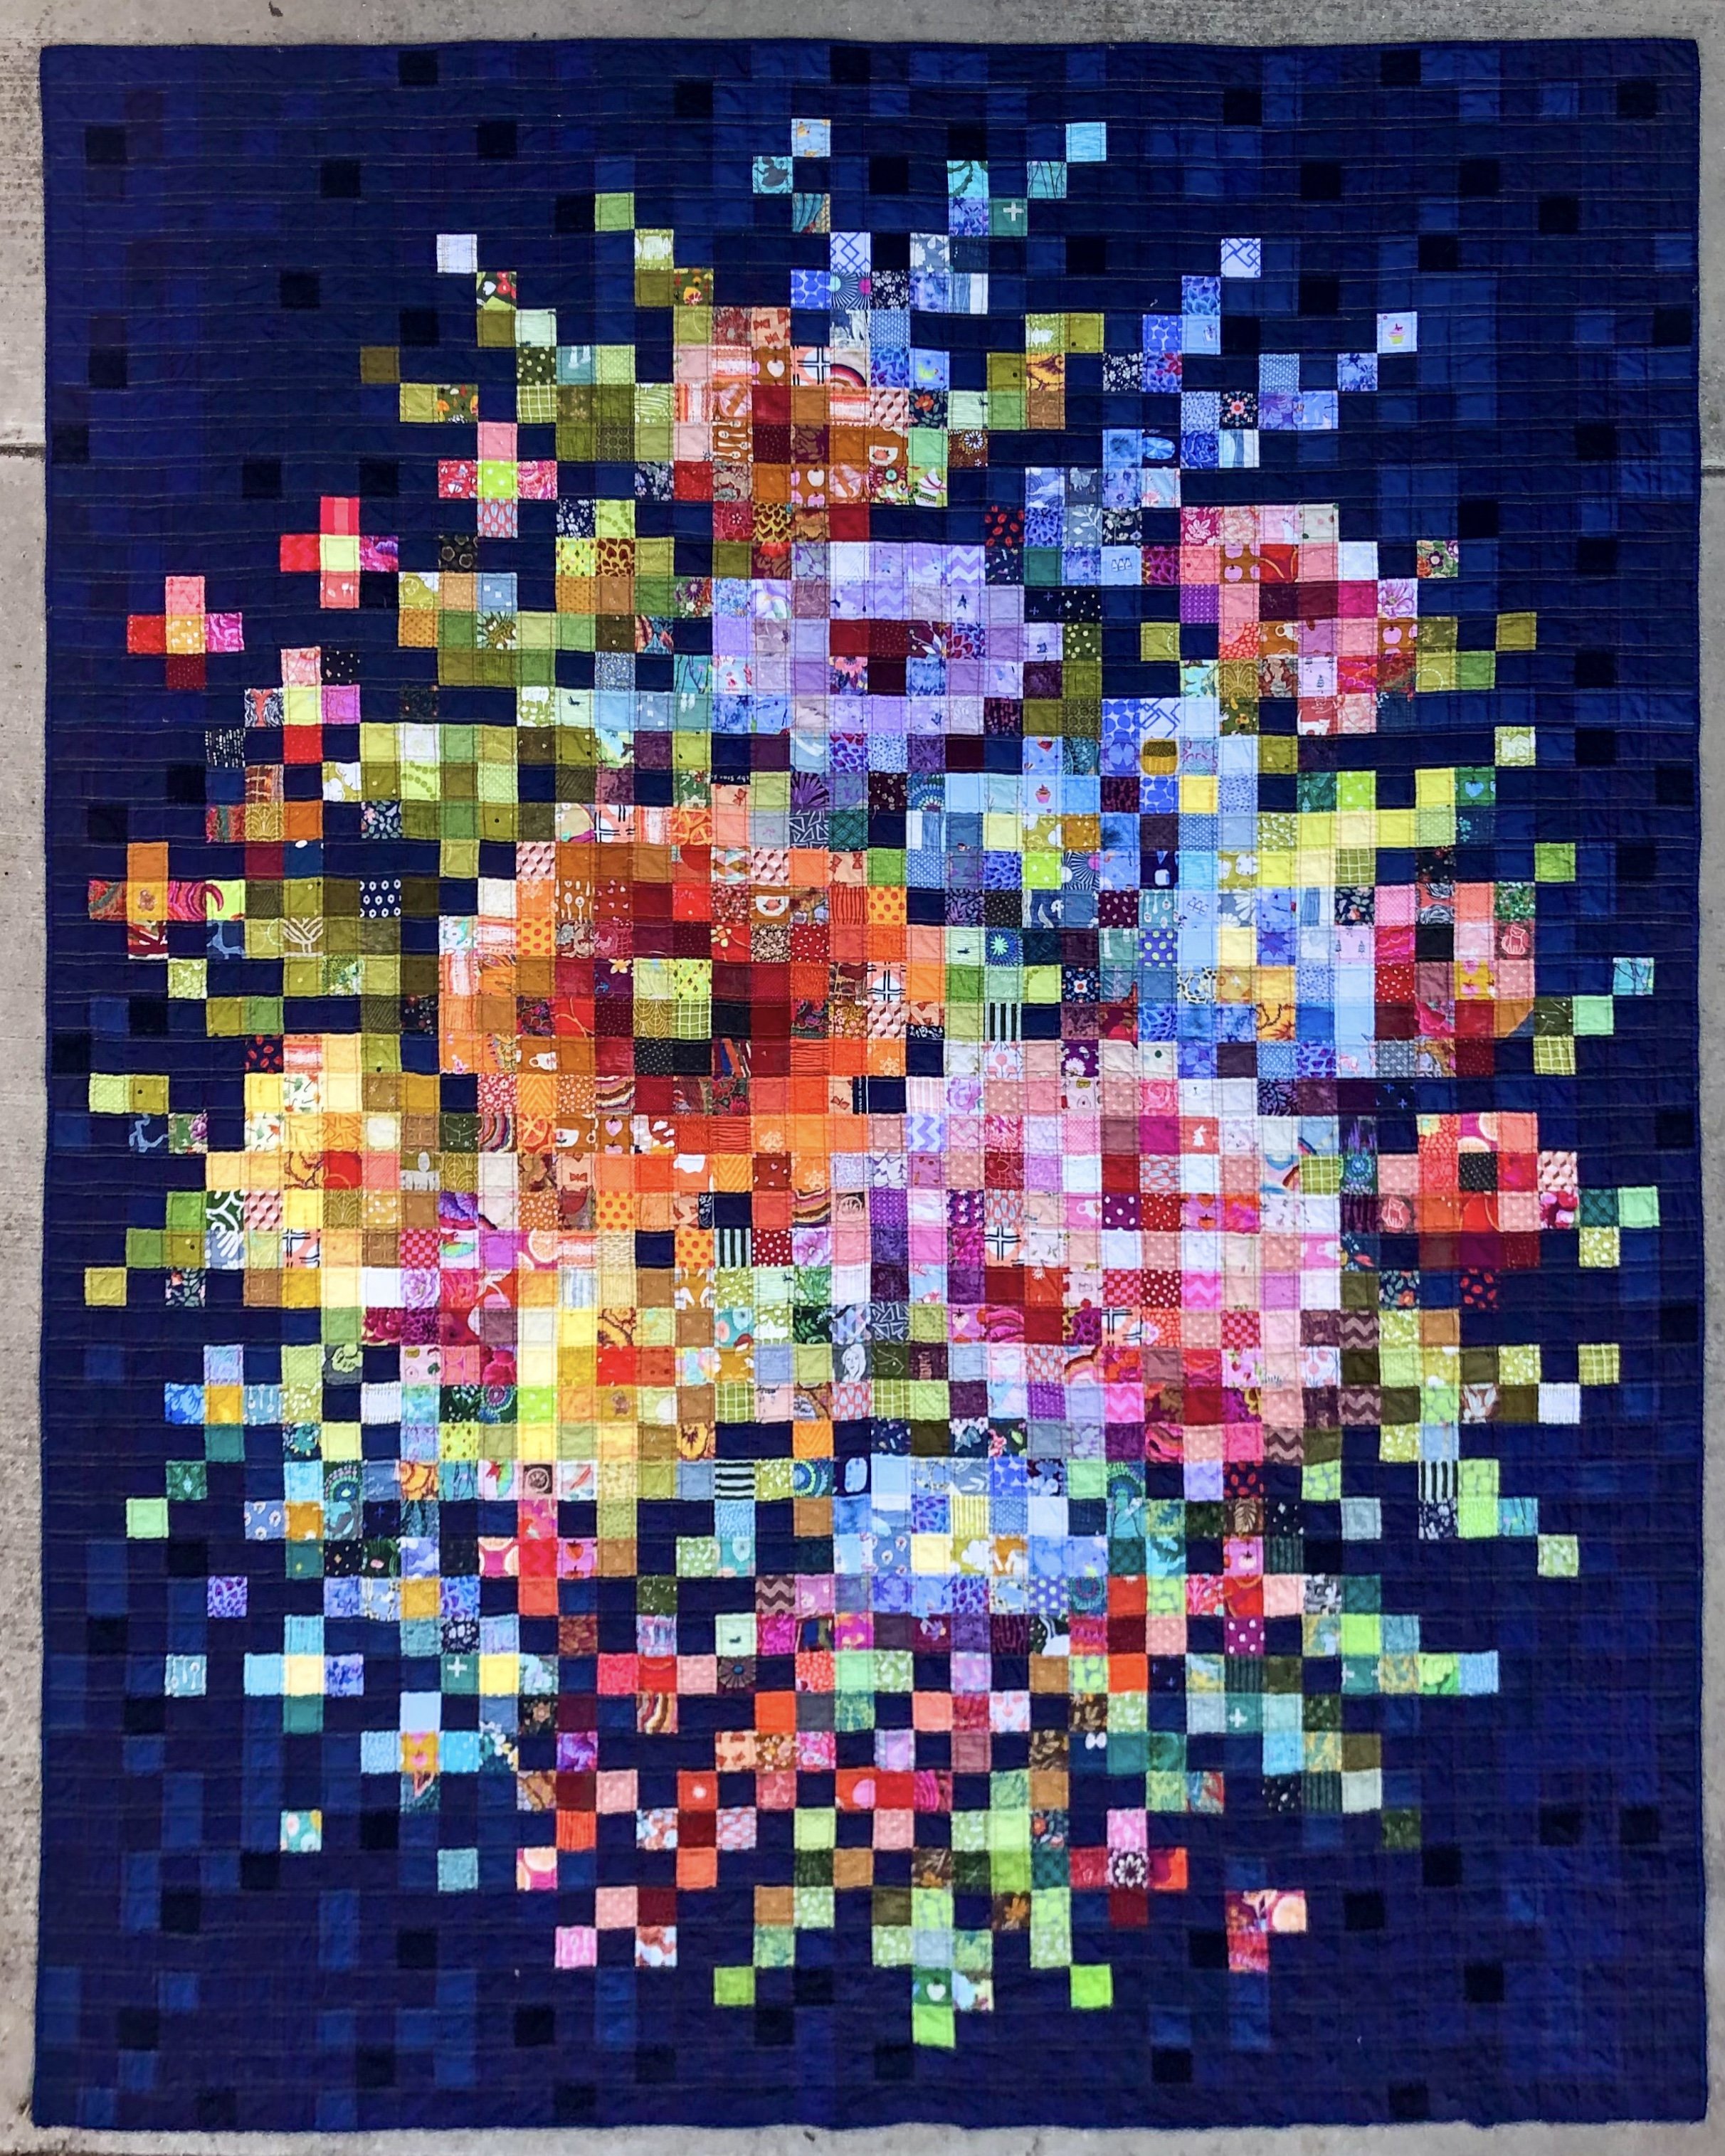
Using color in this way, to this degree, with scraps and patterned fabrics was something new to me. It was a huge learning experience:
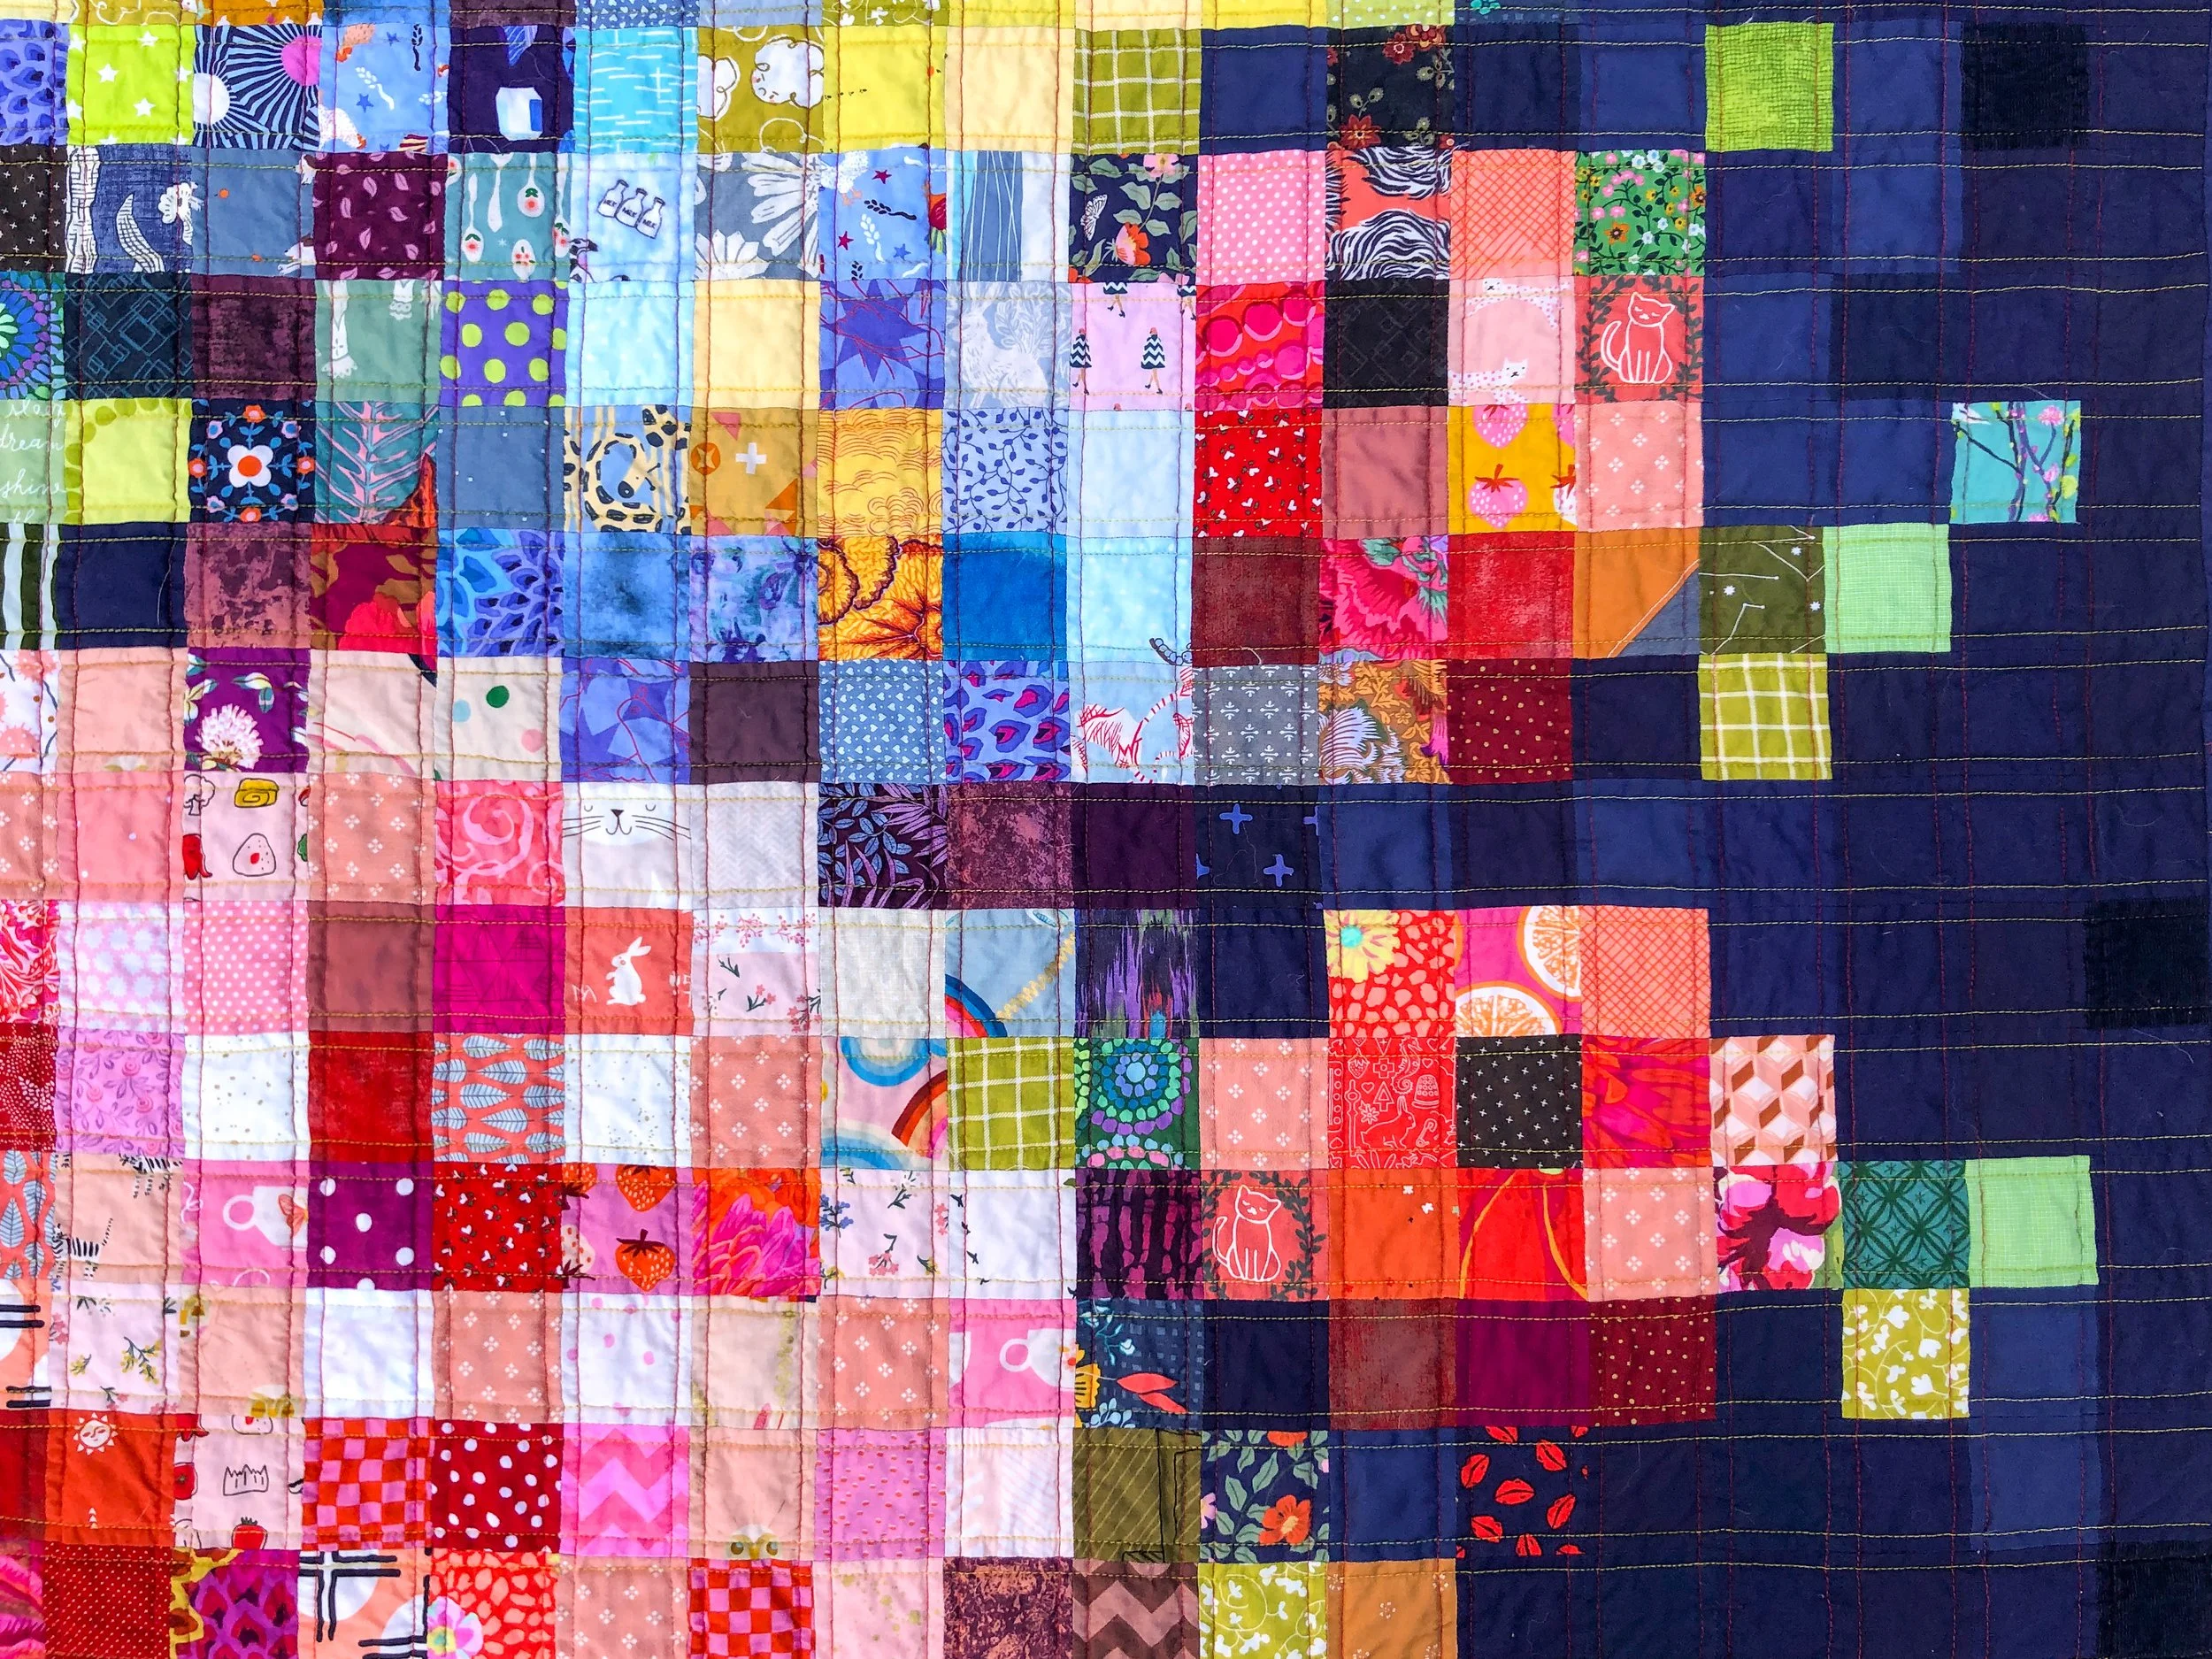
Patterned fabrics behave differently than solids: the color you think is dominant in the design when viewed up close or on it’s own may not actually be the color you see when you step back.
Some regular and geometric patterns with high contrast and hard lines (e.g. stripes, polka dots, plaids) don’t blend as well as a fabric patterns with more organic shapes and lower contrast.
Although I absolutely love the illustrative style of Ruby Star and other novelty designer fabrics, some of these patterns have too much contrast in color to blend well (e.g. Camellia Teacups used in orange flowers).
In some areas, I feel there isn’t enough contrast, like in the yellow flowers on the left and the blue flowers on the right. Unsurprisingly, I don’t tend to use yellow in my everyday quilting, so finding a range of colors in my scraps was difficult.
Overall, I’m happy with the result. I was able to make a dent in my scrap collection - there are after all over 2,000 squares in this quilt. It’s like a record of all the fabrics I’ve loved over the years, the perfect search and find. Using 2.5” squares instead of 2” significantly increases quilt size and was certainly a challenge to my confidence in finishing. Though I’m happy the quilt fits nicely on a full or queen size bed. I would definitely consider making another pixel or embroidery-inspired quilt with my scrap bits one day.